
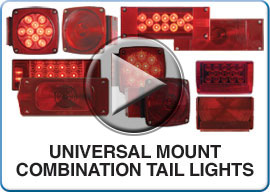
PLAY VIDEO Combination Tail Lights - Installation/Replacement Instructions

PLAY VIDEO Sealed Tail Lights - Installation/Replacement Instructions
Installation Troubleshooting Tips
None of the trailer's lights work
Re-check the vehicle's trailer plug. An inexpensive circuit tester is a good way to do this.
It plugs into the vehicle's trailer socket and will indicate if power is reaching the plug.
If the tester indicates power at the vehicle’s trailer connection, then the problem likely
exists in the trailer's plug. Inspect it for damage and replace as appropriate.
Certain trailer lights don't work
The problem is most likely at the light’s connection to the trailer's wiring. Check wire
connections and/or the light’s own plug if it has one. If after that it still doesn’t work,
use a 12-volt test light to make sure the trailer wire feeding the light does have power.
If it doesn’t, trouble shoot the trailer wire back to all connections leading to the
trailer's main plug.
Certain lights are dim, while others are bright (marker lights)
Definitely a grounding issue at the light itself. If you used the old light's base and just
plugged the new one into it, check how the base is mounted to the frame. If riveted, the
rivets have likely vibrated loose and contact with the frame is poor. Drill out the rivets
and replace with stainless or brass screws. If screws, they likely are corroded and should
be replaced. In either case, now go ahead and also install the new base.
All trailer lights are dim, or fade in and out
It's a grounding issue at either the vehicle's trailer plug or the trailer's plug to the
frame. In both cases, make sure the white ground wire is attached to the respective frame
with a screw.
After trying everything, one light still doesn't work
It is rare, but is a possibility that the light was damaged during shipment or has simply
failed for some reason. If an Optronics light, all you need to do is contact Optronics'
customer service and explain the situation, and when and where the light was purchased,
to get a prompt replacement.
Trailer wiring is a total mess
Don’t waste your time trying to patch and fix problems that come from old, weathered wiring
or from someone else's makeshift patchwork when you can easily run a brand new Optronics
trailer wiring harness instead. A helpful tip for doing this is to not pull your old wiring
out first, but use it to help feed your new wiring through the frame. Simply fasten each
side of the new wire to the old wire up at the farthest point forward (basically the
trailer's plug), and then go to the farthest point at the rear of the trailer (typically
the ID light bar) and pull the old wire out and the new wire into place. Repeat on the
opposite side. You will need to splice accessory wires at the appropriate locations for
side markers and such, but it is a much quicker and easier fix for problematic
wiring issues.